RunwayML Flash Residency: MatCap Mayhem


A MatCap, short for “material capture”, is a way of representing an object’s material and the lighting environment within a single spherical image. Because all of this information is compressed into the image, we can apply them to objects and skip any expensive lighting, reflection, or shadow computation.

To apply a MatCap texture to an object, we transfer its shading and color by mapping normals from the sphere to corresponding normals on the target object. The mapping is easily calculated, and can produce some very interesting non-photorealistic results at blazing fast speeds. As a result, MatCaps are a tried-and-true way to prototype and interact with materials and 3D models.

MatCaps come in a wide range of colors and varieties, but they all share a few defining features. First, as a consequence of the normal-to-normal mapping process, MatCaps are all square images. Second, because MatCaps describe how texture and lighting would look on the surface of a sphere, they contain a distinctive “circular” shape. Third, most tend to model materials with only low-frequency details. If an object is made of two separate materials, it is much neater to model them with two separate MatCaps rather than compressing both materials into a single MatCap.
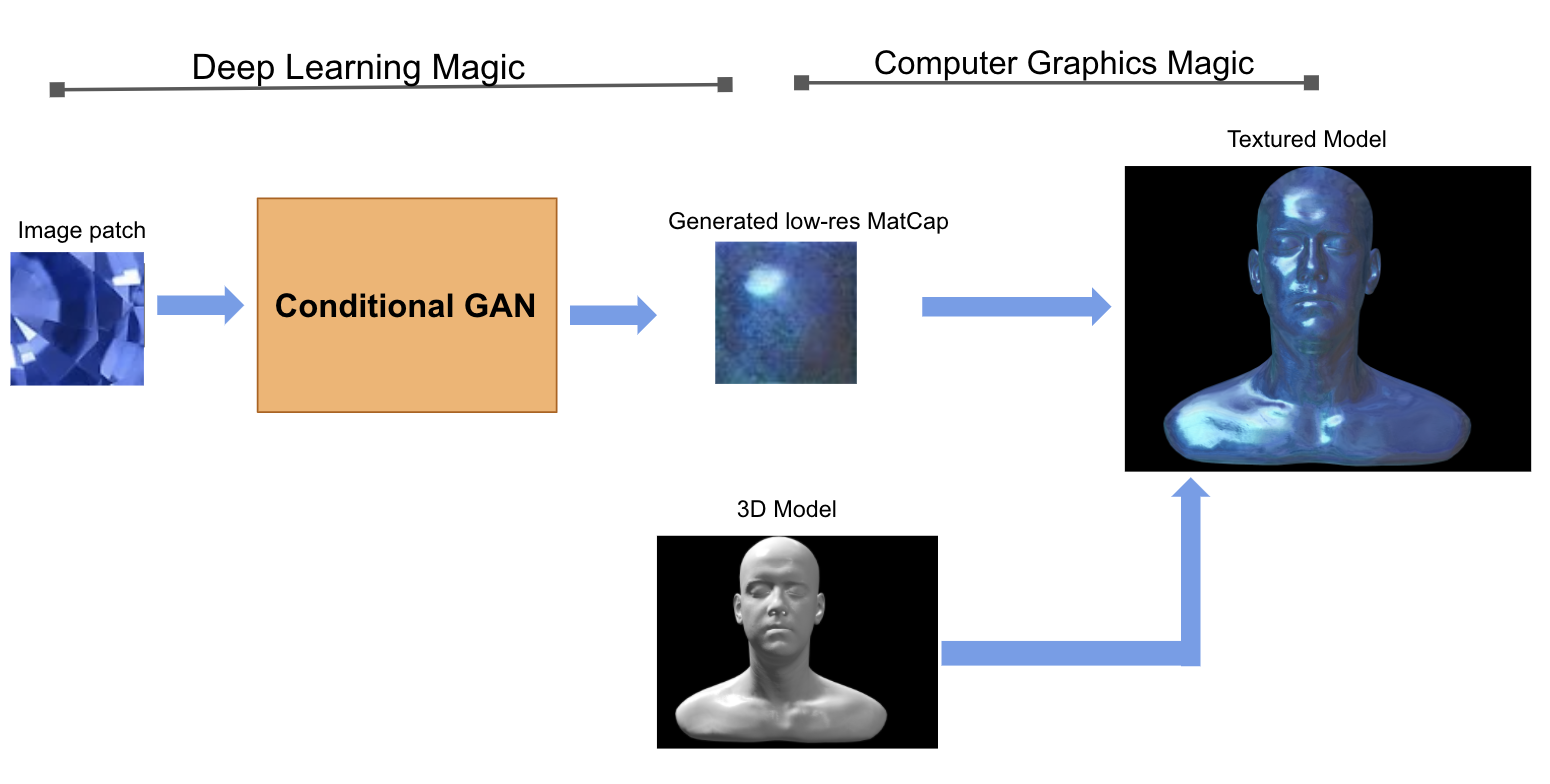
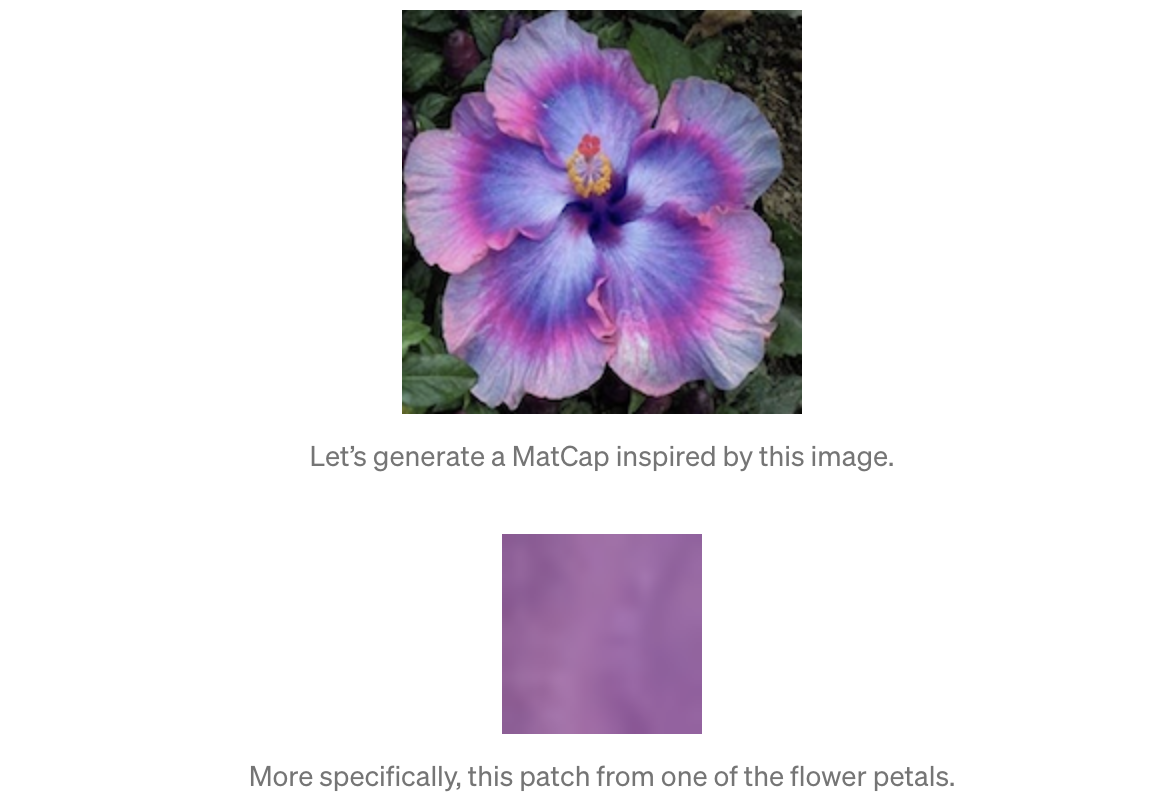
There’s a lot of room within these constraints to explore and create. I was interested in applying deep learning to this exploration task: generating valid MatCaps that could be taken right out of a neural network and applied convincingly onto a 3D model. I also wanted to add some user control to the model’s generations. The model would draw some “inspiration” from a small, user-provided piece of an image and generate a low-resolution MatCap, inferring a spherical shape, existence or positions of highlights, and the size of shadowed regions.

Week 1: Collecting Data
RunwayML had several models at its disposal. I started by taking the application on a test drive inspired by Yuka Takeda, who used a generative model called StyleGAN to generate MatCaps. To get a hang of querying Runway’s hosted models, and also get my hands on one of those mesmerizing latent space walks, I also fine-tuned StyleGAN on a small dataset of MatCaps. I fine-tuned StyleGAN on asmall online dataset of MatCaps. Fine-tuning took only a handful of hours, and did not disappoint.

Mulling these results over, I settled on three key takeaways to inform the rest of the residency.
- Even though StyleGAN produces high-resolution images(1024 by 1024 pixels), the MatCaps still exhibited some blurriness around the edges and highlights. I’m sure fine-tuning on a larger dataset for a longer period of time would gradually clear up these issues. Since even the most advanced GANs can struggle to produce large images, I decided to stick with generating low-resolution MatCaps and leave higher resolution for future exploration.
- I chose to fine-tune on RunwayML’s “Faces” checkpoint because both human faces and MatCaps were vaguely…spherical? At some point half-way through the fine-tuning process, I was lucky enough to watch my model generate a human-MatCap hybrid. Think bright green MatCap ,wearing slightly blurry glasses. I regret not taking a screenshot.
- There’s no denying that StyleGAN is a powerful tool for image generation, and Runway made interacting with the model very accessible. But without some surgery on the model’s architecture, there was no way to actually control what StyleGAN was generating. I wanted a neural model that could draw “inspiration” from an existing splash of color or texture when generating MatCaps. If I wanted more creative control on what a GAN produced, I would need a different model.
Week 2: Choice of Architecture
Some reading led me to Conditional GANs. While StyleGAN and other similar networks produce novel-yet-arbitrary images from a vector of random numbers, CGANs are built to generate samples that exhibit a specific condition. CGANs have been used for tasks like super-resolution of a low-resolution input image, image-to-image translation, and generating images from text. Since I wanted my neural network to generate a MatCap based on characteristics specific to an input patch, a CGAN seemed like the right choice. I spent the second week of the residency building out one of these architectures, poking and prodding hyper-parameters into line, and watching its training epochs tick by**.**

I generated a few hundred MatCaps to train the model, using the first week’s fine-tuned StyleGAN model. I selected 15 random 16x16 pixel squares from each MatCap image, and trained the generator to upsample the small patches back into their parent MatCaps. The model would learn about colors and shading in this the training process so that, at test time, it could generate MatCaps from patches of pixels outside the training dataset.
While that was training, I spun up a visualizer with Three.js on top of its helpful MatCap example. I chose a small patch from random images (found via the web) to run the model on. Here’s a handful of Week 2 results!

Week 3: To Interactivity and Beyond..

In order to more easily interact with the model, I uploaded it to Runway as a Hosted Model. This feature provided an API endpoint I could use to query and control the model. The whole uploading process was very easy with Runway’s numerous tutorials and examples, and only took about five minutes.
I extended Three.js’s MatCap viewer to extract a patch from an input image, query the model over the web, and texture a 3D object with the output. The results are in the video above — It takes a few extra seconds to send data to and from the model, but I think it’s worth it!
Future Work
I had a really good time developing this project as a proof of concept, and I can think of several features I’m excited to add.
- As augmented reality on mobile devices becomes more prevalent, the demand for 3D content and interactivity is increasing rapidly. A smoother pipeline might query the model right from a phone application. Texturing simulated 3D models in augmented reality with MatCaps “inspired” by pieces and patches of the real world would be an interesting way to add more interactivity to the experience.
- There’s always a higher resolution. While low-resolution MatCaps can still work on most models, we inevitably miss some sharp colors and finer details around specular highlights. And of course, there’s something very compelling about watching a latent space walk through StyleGAN’s high-resolution outputs.
- MatCaps are one of several representations of appearance and texture. If we fed patches of normal maps or UV texture maps into a CGAN, what sort of outputs would we get? It would be interesting to explore upsampling small image patches into both 2D MatCaps and 3D normal maps. By their powers combined…
- Finally, the model has a distinctive bias towards producing blueish-purplish MatCaps. I attribute it to not enough diversity in the training set. I’ll have to collect more varied training data for future iterations of the project.
Finally, I want to thank RunwayML for giving me the opportunity to participate in this Flash Residency. The application was intuitively designed and easy to use, the documentation was plentiful, and the Runway developers were generous with their advice and constant support!